
One of my favourite techniques to add colour on cards is using watercolours. There are so many different looks that can be achieved with watercolours and it is a great way to blend colours together.
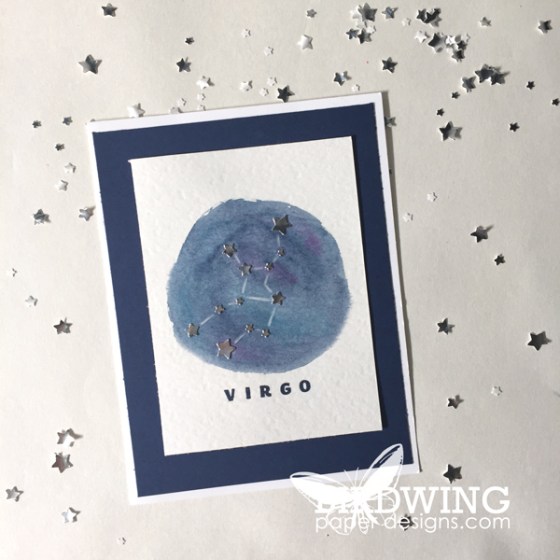
In this post I wanted to share a few tips on how to make a watercolour background used on this constellation birthday card.
To ensure a successful outcome, here are a few basic notes to remember:
- use watercolour paper
- avoid the messy brush and cup of water – use an Aqua Painter
- use good quality colours like Stampin’ Up! inks and markers
In experimenting with different ways to apply watercolour using Stampin’ Up! inks, I discovered that the easiest way to control the blending of the colours is to flood the paper with water first and then add the ink. In this background, I painted the water in the shape of a circle (right image below) rather than spritzing the whole paper with water (left image) so I could ensure a defined outline of the shape.

Colour was then added starting with the Night of Navy background and finished off by blending in a teal colour (Bermuda Bay) and purple (Rich Razzleberry). It is best to start out with small amounts of ink and add more as you go.

The initial flooding of water on the paper will allow the colours to “float” on top of the paper to give you time to blend them together before it dries.
Once the paper is dry (speed up this process using a Heat Tool), the rest of the card can be assembled.

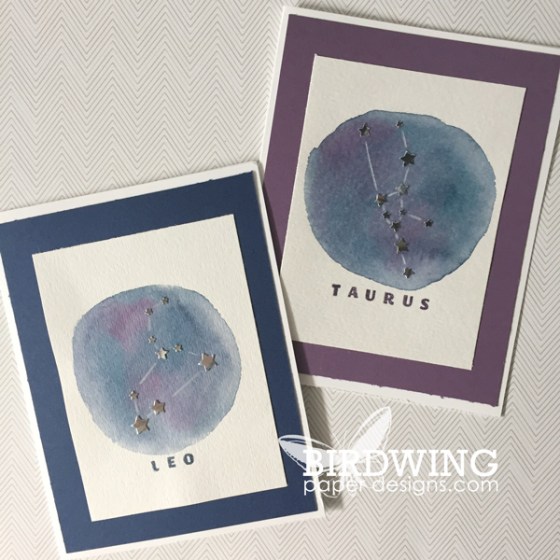

This card is a new favourite of mine and have made several of these to give out for birthdays in the upcoming months.
Happy watercoloring!
Leah


I so have to try this! ❤️ this card!
LikeLike
You should!! The watercoloring is fun to play around with.
LikeLike