
Fall is upon us and there is so much colour and design inspiration all around. A few weekends ago I took the kids and their Grandpa on a nature walk and we were amazed by the colours of leaves on the trees. Each fall I am wowed by the beauty of nature and this year did not disappoint.

Inspired by all these leaves, I decided to experiment with the Simply Pressed Clay from Stampin’ Up and create my own fall leaf using the imprint of a real leaf from our yard. Here is how I did it:
- Flatten a small piece of the clay between two sheets of wax paper with a rolling pin. (The wax paper prevented the clay from sticking to the rolling pin.)
- Gently press the leaf into the clay just so it leaves a nice impression. If pressed too much, the clay will stick to the leaf.
- Remove the leaf and place the clay in the freezer for 10 minutes. When you remove the frozen clay, you will be able to cut out the leaf impression and smooth the edges.
- Let clay leaf dry overnight.
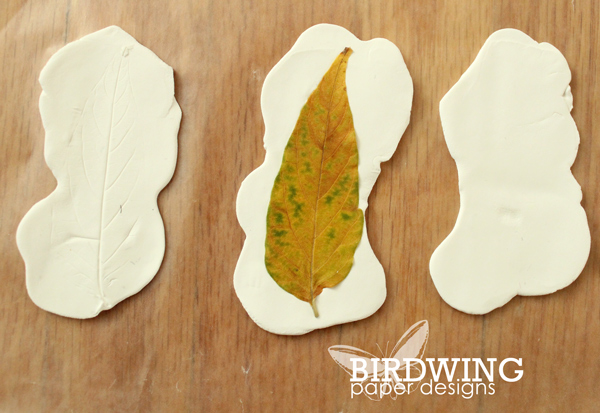
(The picture above shows the steps from right to left. A little backwards, I know, but I didn’t want to start all over again!)
The dried clay leaves are now ready to be coloured!
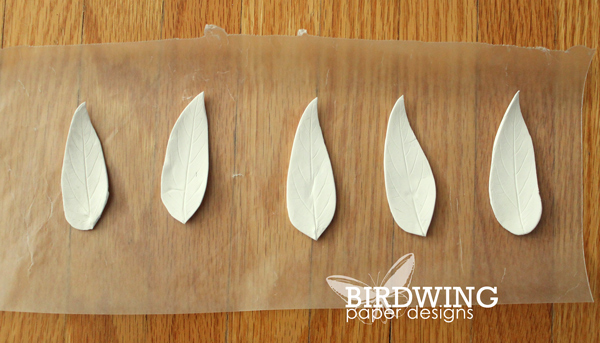
I used three different coloured stamping inks on the leaves: a yellow (So Saffron), an orange (Pumpkin Pie), and a green (my favourite, Old Olive). The inks were sponged on in layers from lightest colour to darkest.

I love how the veins of the leaves really pop once the colours are on! Now, what to do with this gorgeous leaf? Make a card, of course!
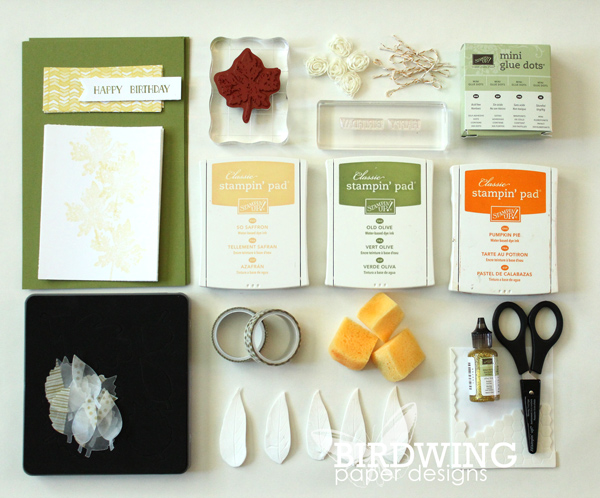
These were the supplies used to make a beautiful fall birthday card:
I wanted the clay leaf to be the star of the card so I subtly stamped some background leaves in yellow on the white card stock and layered the clay leaf with a couple of wax paper and washi tape leaves. To make these leaves, I placed a piece of wax paper on the Bigz Autumn Accents cutter. Then strategically placed the washi tape on the wax paper to just cover part of the leaves to be cut out, and ran it through the big shot. This could also be done with vellum and washi tape, but I was out of vellum and thought the wax paper was an interesting substitution.

Here is a look at the final card with all the layers finished and embellishments added:

I think this is one of my favorite birthday cards and it was all inspired by a nature walk with the family.
How does nature inspire you?
Leah


Such a beautiful card and so creative!! Love the clay leaf!!
LikeLike
But now that you’ve seen it, I will have to make a different one for your fall birthday!
LikeLike
Brilliant idea! Beautiful card!
LikeLike
Thanks Cindy! I love experimenting with that pressed clay!
LikeLike