
When I started making cards with Stampin’ Up products I made a deal with myself that I would only buy supplies to make Christmas cards. Their catalogues were filled with so many stamp sets, pretty paper packs, and cool tools that I knew I could easily spend all my extra money on this new crafting hobby! By limiting my spending to just Christmas things, I was able to practice a bit of restraint and not buy everything in the catalogue!
Now, 10 years later, I have a fair amount of crafting supplies and it’s not just for making Christmas cards! But at this time of year, I can’t wait to dig out the Happy Holidays stamps and glitter paper and start building cards to send to friends and family.
A few weeks ago I did a Christmas card blitz so I would be ready for the holiday season. These are the four cards I made: (You may recognize them from a post a few weeks ago!)

One of these cards stood out as a favourite so I made a few more. Can you guess which one it was? Well… here is a hint:
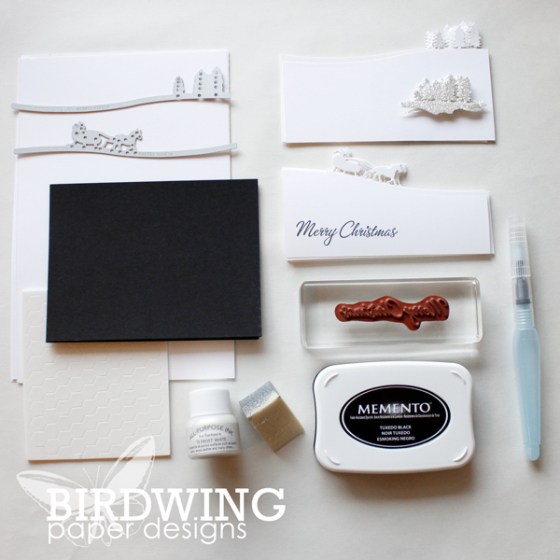
That’s right! The Moonlight Sleigh Ride Card! This one used the new Sleigh Ride Edgelit dies from the Stampin’ Up 2015 Holiday Catalogue which quickly became my new favourite Christmas product. (As you can see far above, I used it in 3 of the 4 cards so it must be a favourite!)
Most of the work on this card was spent creating the background moon scene. Here’s how it was done:

- A 1 3/4″ circle was punched out of a scrap piece of paper. Because I knew I was going to make multiple copies of this card, the circle was punched in a specific place on the scrap paper so the moon would be in the right spot for each card. To make sure I knew which way was up, a small notch was cut in the top right corner of the scrap paper.
- The moon was made by simply sponging on shimmery white ink in a circular movement.
- To make the snow, cover up the moon with the punched out circle, apply the same shimmer ink with the Aqua Painter, and tap the brush a few inches over the card stock.
- Let this dry before adding the other layers.
Once the background layer was dry and adhered to the base of the card, it was time to add the trees. To ensure the trees stood out, a second layer of glitter paper was added to the white card stock.
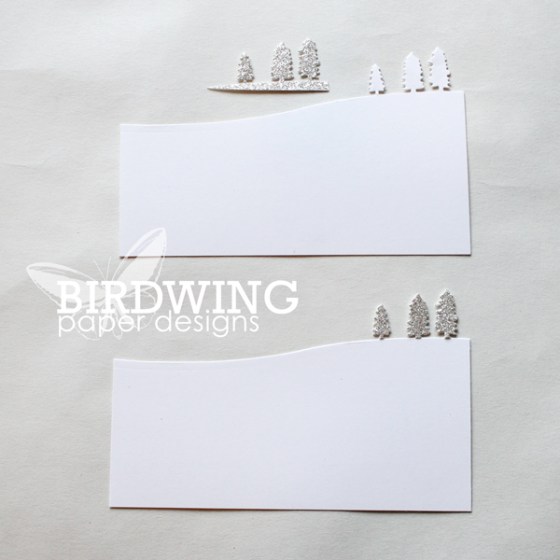
Finally, the sleigh ride scene and a greeting was added.

This turned out to be such a beautiful, non-traditional Christmas card!
Handmade cards are like a small piece of art and shouldn’t be hidden behind a plain envelope. Try presenting them in clear envelopes this year. They look great attached to a gift bag, taped to a box, or hanging around the neck of a nice bottle of wine.
Happy card making and gift giving this holiday season!
Leah

