
One of my favourite stamp sets from the new Stampin’ Up! catalogue is Good Morning Magnolia! My previous post, Magnolia Stamp 3 Ways, highlighted the use of the large magnolia stamp from this set – which is an eye-catcher!! In this post, I wanted to introduce the coordinating set of dies that came with the magnolia stamps, the Magnolia Memory Dies.
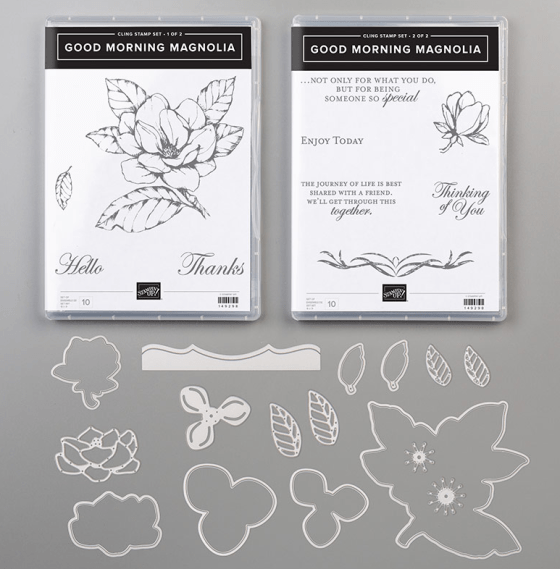
These dies are great for cutting out the coordinating stamped images, but there is also a couple of dies used to create paper flowers – magnolia flowers, of course!!
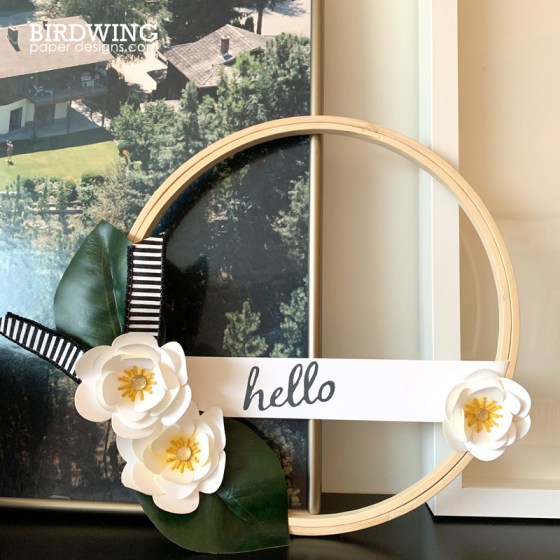
The following step-by-step instructions will show how to make the paper magnolia flowers and also how I used them to create a hoop to add some summer decor to your home.
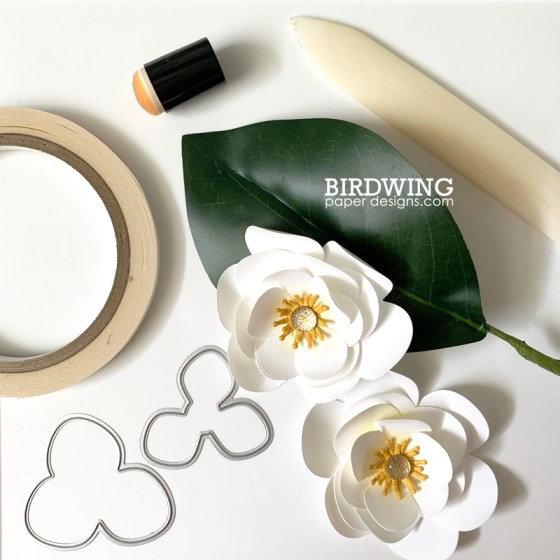
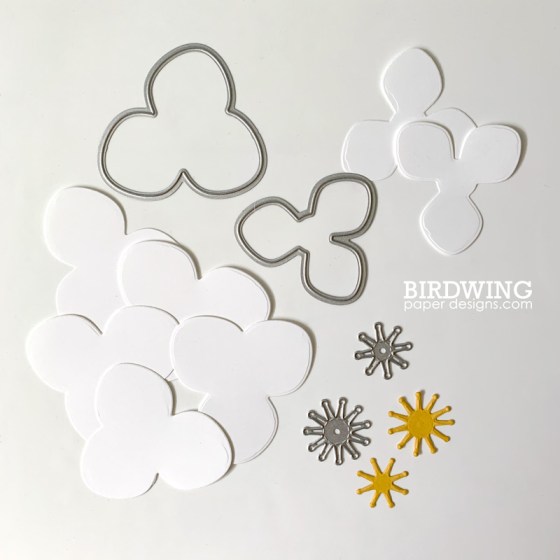
The first step to creating the paper magnolia flower is cutting out all the pieces of card stock that are required. I ran the petal and flower centre dies through the Big Shot to cut out 5 large petals, 2 small petals (both in Whisper White card stock), and one of each size of the flower centres (in Crushed Curry).
Next, a layer of colour (So Saffron) was sponged onto 2 of the large and the 2 small petal bases. I concentrated the colour at the centre and faded it out to white on the ends of the petals.
The three petal bases that make up the bottom layer were not sponged in colour because the colour would just get covered up by all of the layers on top anyway.

The inked up petals were then given some dimension by running a bone folder up each petal to curl them upwards.
The uncoloured ones only had two of the petals curled because the remaining flat petal will help with the assembly of the flower in the next few steps.

Before the whole flower was put together, the centers were assembled using a small glue dot to adhere the two yellow centre pieces and then finished off with a Gold Faceted Gem.

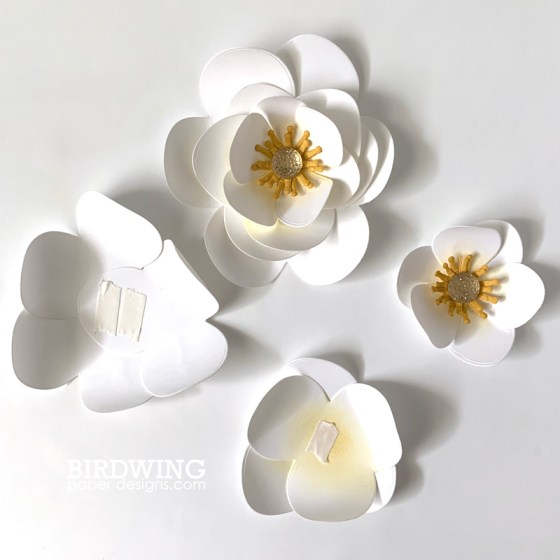
The paper magnolia flower consisted of three layers of flower petals. The bottom layer used 3 large petals assembled together to create the widest flower layer (left one in image below). The flat, uncurled petals made up the center of the flower and will become the base for all the other layers.
The middle layer was 2 large petals centered together (bottom right) and the top layer was the remaining 2 small petals (top right). I used the Tear & Tape adhesive to join all the petals together as it is a stronger adhesive and is great for 3D items like paper flowers.

Finally, all the layers were adhered together (with more Tear & Tape) to create a beautiful, white magnolia flower. Sometimes the petals flatten out in the assembly process, but they can easily be fluffed up!

Now that the flowers are made, what do you do with them? Make a wall hanging!!
I used a 10″ embroidery hoop, artificial magnolia leaves, 1″ wide ribbon, and 3 paper flowers for this project – 2 like the ones created above and one smaller flower.
I stamped a piece of Whisper White cardstock (1 1/2″ x 8 1/2″) with a large sized greeting. (This “hello” stamp was one I carved a few years ago and was perfect for this project! Read more about how I made the stamp here.)

The paper was then threaded between the two layers of the embroidery hoop (loosen it first) and pulled taut with the greeting close to center.
To complete the hoop, the leaves were hot glued into place followed by a piece of ribbon and then the paper flowers. HINT: Position the greeting, leaves, and flowers so the hoop clasp is hidden under the leaves! (Thanks to my husband for suggesting this!!)


A ribbon can be added to hang the hoop or leave it as is to rest on a bookshelf.
If you make these flowers or the hoop, I would love to see them! Tag them on Instagram with #birdwingpaperdesigns and be sure to follow me @ellefedynak to see all my cards and projects!
Happy paper crafting!!
Leah

