The July-December 2022 Mini Catalogue has an exciting new accent… the Pearlized Enamel Effects Basics. It comes in three colours (red, black, and white) and allows you to add a pearlescent shimmer to your project in many different ways.

Because it comes in a bottle as a lacquer, you can make dots, lines, shapes, or words. I decided to see how it would work if you combined two colours, and used it to make a spider web for a Halloween card.

Here are the steps to make this spooky spider web:
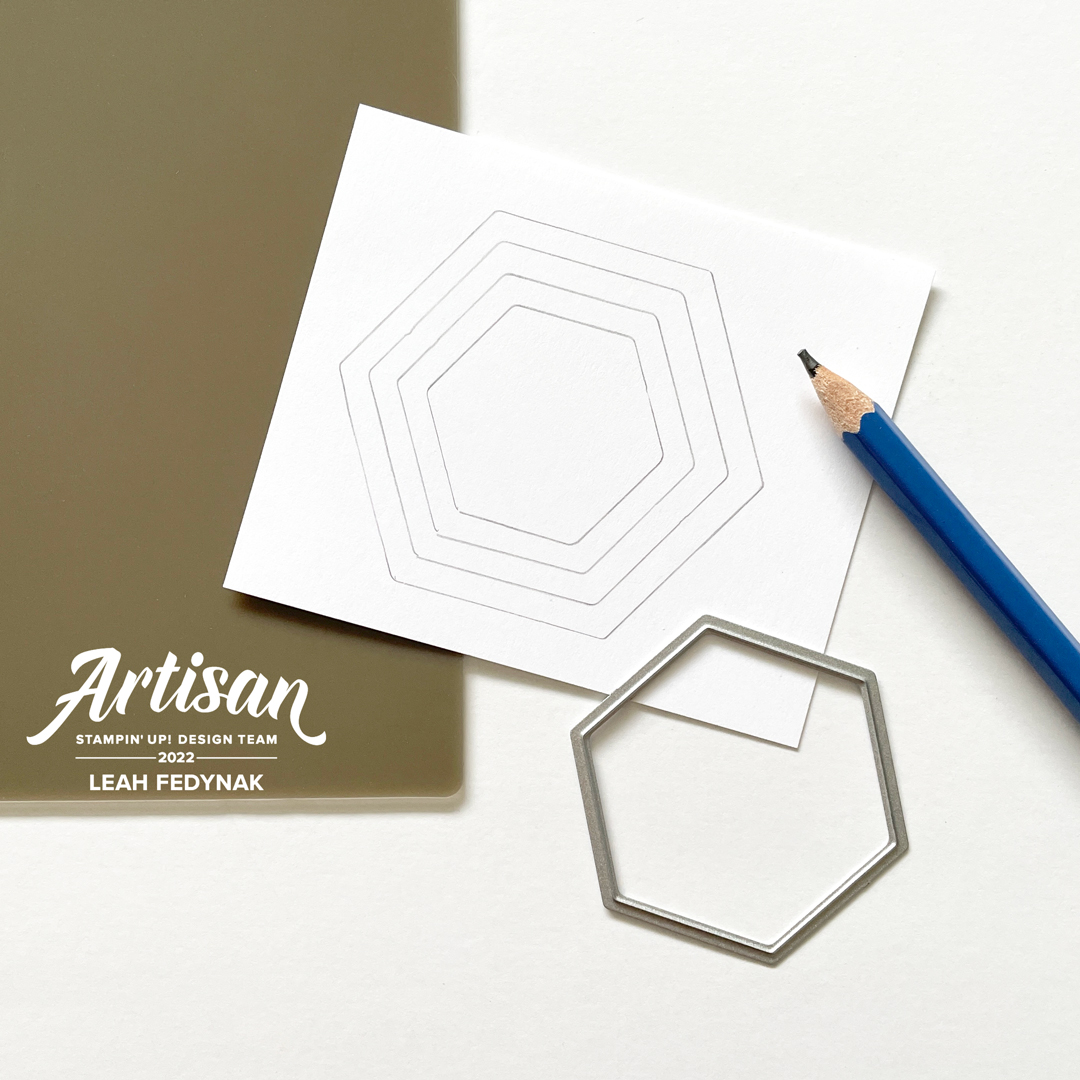
Step 1. Draw a template for the spider web by tracing the hexagons in the Beautiful Shapes Dies.
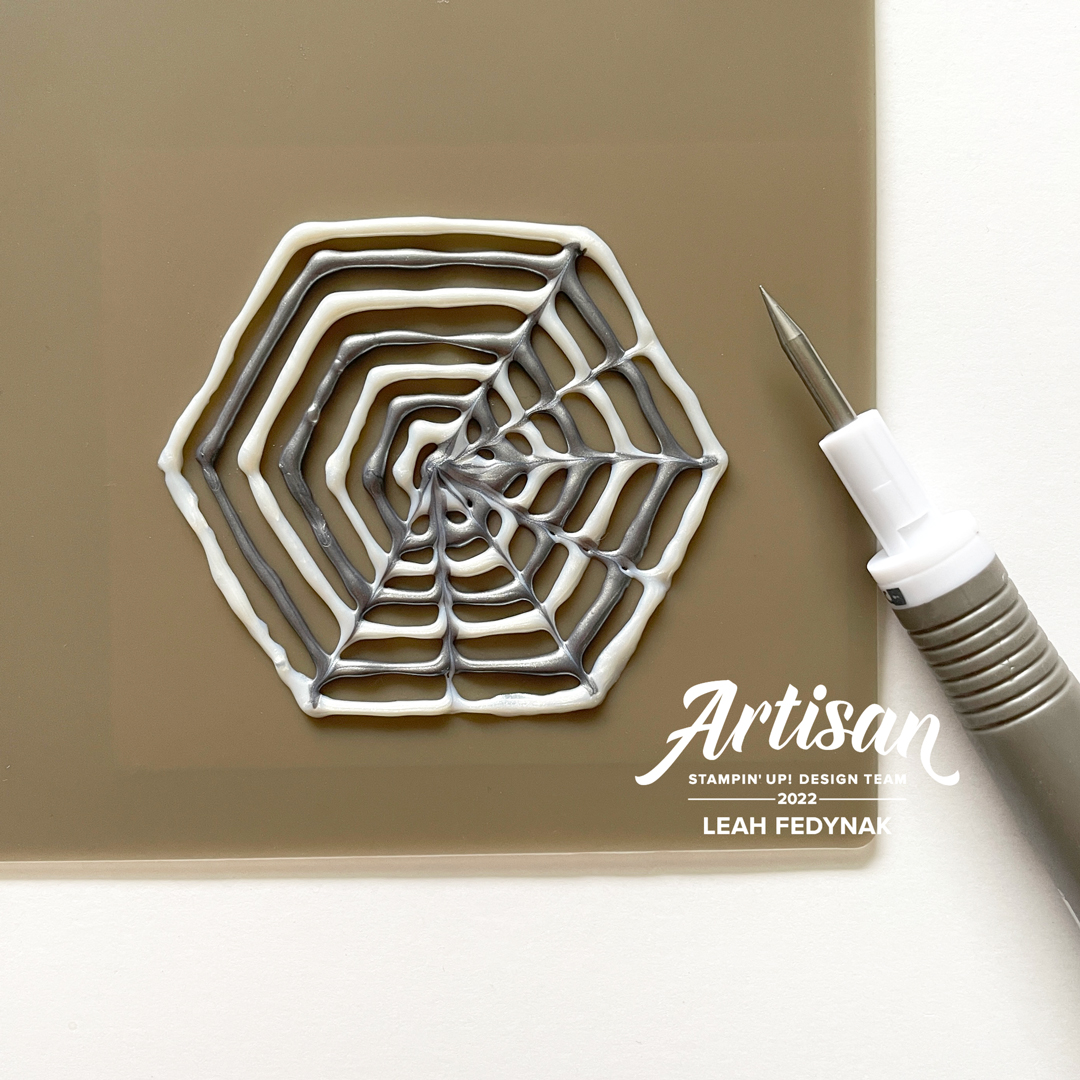
Step 2. Place the template under the Silicone Craft Sheet and trace the hexagons in alternating white and black with the Pearlized Enamel Effects Basics. Add a few more hexagons to the inside and finish with a dot in the center.

Step 3. Use the paper piercer end of the Take Your Pick tool to drag through the lines from the center out. The next one will be from the outside in to create a fun pattern. Set it aside and let the web dry for 5-6 hours
Step 4. Once it is dry, gently peel the pearlized web from the Silicone Craft Sheet and use it to layer on a spider-filled Halloween card. For this card, I used a spider stamp from Cottage Wreaths Stamp Set.

Have you tried using the Pearlized Enamel Effects yet? There are so many different ways to use it and i can’t wait to experiment some more!
To purchase any of the products I used in this project, please visit my Stampin’ Up! Store to order or contact me for more details at lfedynak@gmail.com.
Leah