
Over the last year and a half, I have reorganized my craft space a dozen time!! Every time I get more product, I have to rearrange things to get all the supplies to fit! Don’t get me wrong… it’s a great problem to have!
Just over a year ago I published a post with a craft room tour and when reading it, I realized my space looks quite different now. I have added more storage, replaced a desk, and have a lot more craft supplies!! Want a quick tour?
Let’s start with craft supply storage and the IKEA Kallax unit I use:
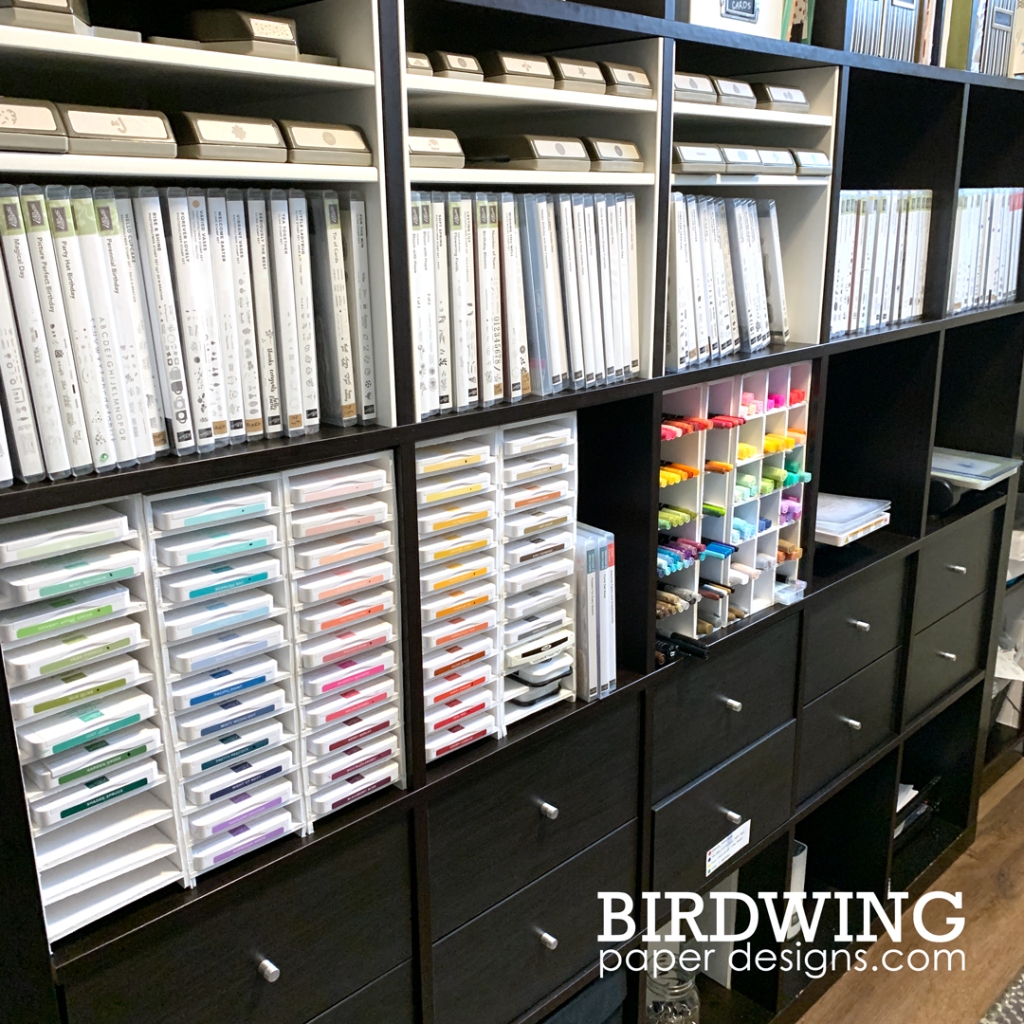
I recently had a brilliant idea for stamp set and punch storage using the Kallax inserts with 4 shelves – by removing the bottom two shelves you can fit the stamp sets below and the punches on the top two shelves! Finally, no more wasted space in those 13″ x 13″ cubes!

Since I am in Canada, there is not a lot of options for affordable craft storage solutions. I have looked into a few storage places in the U.S., but it would cost even more with the exchange rate and the shipping charges are so expensive. I would have had to spend close to a thousand dollars to outfit my storage unit!!
Last year I came up with some cheaper storage shelves of my own using Foam Board. They have held up fairly well, so I made a few more to hold the Stampin’ Up! ink pad collection!

My colouring supplies had also increased in size and needed better organization. I made some more Foam Board cubbies for the markers, watercolour pencils, and Stampin’ Blends. This project didn’t turn out quite like I had hoped it would, but it was still functional, just not perfectly square. I love seeing all the colouring tools together and organized! Plus, there is lots of room for more supplies!!

I recently added a lot more drawer space too for all the embellishments, ribbon, embossing tools, stamp blocks, ink refills, etc. and organized them with Foam Board dividers.

You may notice that there is no paper in this storage unit. I have moved it all to a second, smaller Kallax unit that I use as a paper cutting station.

This is on the opposite wall from the big storage unit and also has my craft desk and display shelves. The newest desk to the set up is a sit-stand desk which is pretty much just a stand desk! I found I was doing too much sitting when crafting, then editing photos and writing blog posts. It is so much better now with a computer station to stand at.

I hope you have enjoyed having a look into my little craft space and get some storage ideas for your own room! I would love to hear if you have any great storage ideas too!!
Have a great week!
Leah


Good evening, I’m trying to make ink pad storage with foam board & i saw the model you made, do you have the measurements you used ?
LikeLike
Each tower that holds the ink pads is 13″H x 4.25″W x 4″D. That way 3 of these towers fits in one Kallax square. The foamboard I used was 3/16″ thick and each space for the ink pads was 15/16″. That gave me 3/8″ of leftover space at the bottom. I hope that helps. It’s not a perfect setup, but it has been good for me for the last few years. I just changed my storage to the Best units and managed to get these towers to fit in there as well.
LikeLike
Thank you so much for such a quick response…
LikeLike